OCS Inventory NG 小記
Server
先從 Windows 版本開始嘗試 這邊我裝 2.1.2 版本
- 文件
不須先安裝 XAMPP 套件
- 首先裝的是 XAMPP 5.6.3 版本 ( BitNami for XAMPP )
- 會出現 UAC 警告, 暫時先不理會
- 安裝完成之後, 安裝 OCS Inventory NG 會出現 perl 模組沒有安裝的訊息, 無法安裝, 故放棄
- 接下來嘗試 1.7.7 版本 xampp-win32-1.7.7-VC9-installer.exe
- 按照預設值安裝, 沒有將 Apache / MySQL / FileZilla 當成 Service 執行
- 安裝完成之後, 安裝 OCS Inventory 也會發生錯誤, 這才發現 OCS Inventory 安裝程式裡面就有內建 XAMPP, 且會自動偵測.
使用預設的 OCS Inventory NG 軟體安裝即可
- 存取路徑 http://主機IP/ocsreports 或是點選桌面捷徑
- 安裝完成之後解決下列錯誤訊息
- 錯誤訊息: install.php 還存在在安裝目錄
- 移除或是rename C:\xampp\htdocs\oscreports\install.php
- 錯誤訊息: The default SQL login/password is activate on your database: ocsweb
- 以下方式 2 擇 1
- 登入 phpmyadmin 修改 ocs 密碼
進入 phpmyadmin 界面 http://主機IP/phpmyadmin
點選 權限 --> 針對 ocs 使用者點選 編輯權限
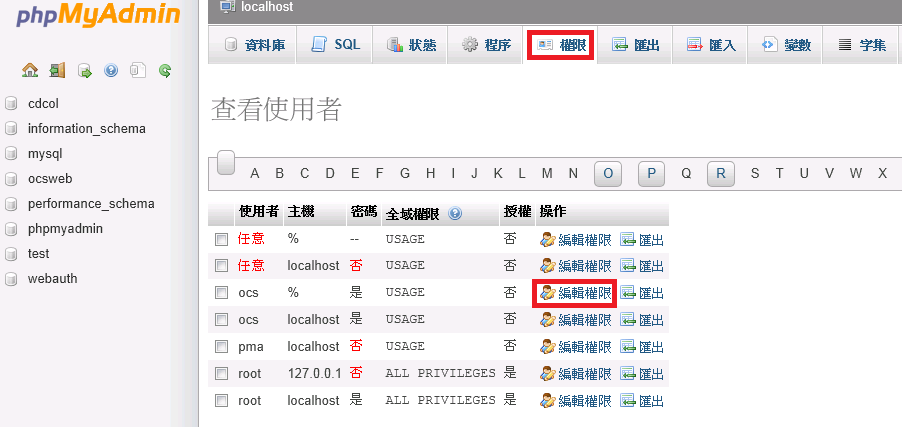
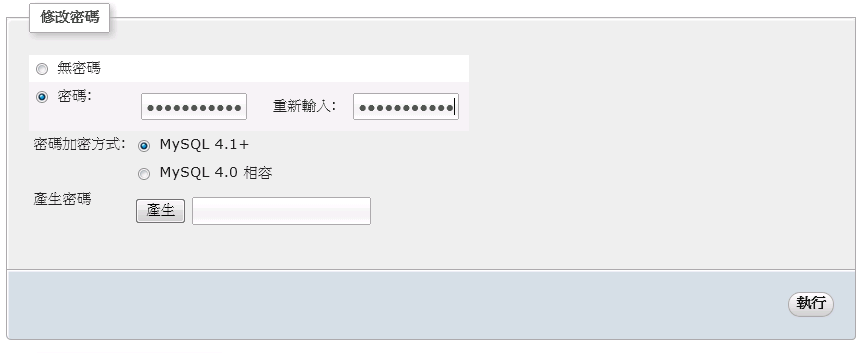
輸入設定的密碼, 點選執行
修改完成之後 OCS Inventory NG 就會出現相關的錯誤訊息, 因為我們已經更改密碼

接下來修改
xampp\htdocs\ocsreports\dbconfig.inc.php
修改內容
將 ocs 的預設密碼改為自定密碼
define("PSWD_BASE","自訂密碼");
以及
xampp\apache\conf\extra\ocsinventory-server.conf
修改內容
將 ocs 的預設密碼改為自定密碼
# PerlSetVar OCS_DB_PWD ocs
PerlSetVar OCS_DB_PWD 自訂密碼
重新啟動 Apache 服務 ( 啟動 XAMPP 控制面板 )
C:\xampp\xampp-control.exe
因為 Apache 已經註冊為服務, 所以點選控制面板右上方的 SCM 按鈕呼叫 服務 視窗
選取 Apache2.2 --> 點選重新啟動

- 錯誤訊息: The default login/password is activate on OCS-NG GUI
- 點選畫面右上角的圖示更改 admin 密碼.

解決 XAMPP 相關安全問題

- 將 MySQL root 加上密碼
- 這也會設定 XAMPP 登入的密碼
- 設定 .htaccess 來限制存取

設定完成將 MySQL 服務重新啟動
----------------------------
=====================================================================
Client 安裝
Windows client
Lab: Windows 7 64 bits
官方文件
下載 Windows agent
解壓縮下載的 zip 檔案
執行 OCS-NG-Windows-Agent-Setup.exe
按照預設值安裝, 重點是 Server URL 指向 OCS Inventory NG 伺服器

上面的 URL http://主機IP/ocsinventory 也可以先在 client 這邊連線看看
如果出現 Error 500 的錯誤訊息, 代表 xampp\apache\conf\extra\ocsinventory-server.conf 之前設定的密碼是錯誤的, 記得修改好, 然後把 MySQL 以及 Apache 重開.
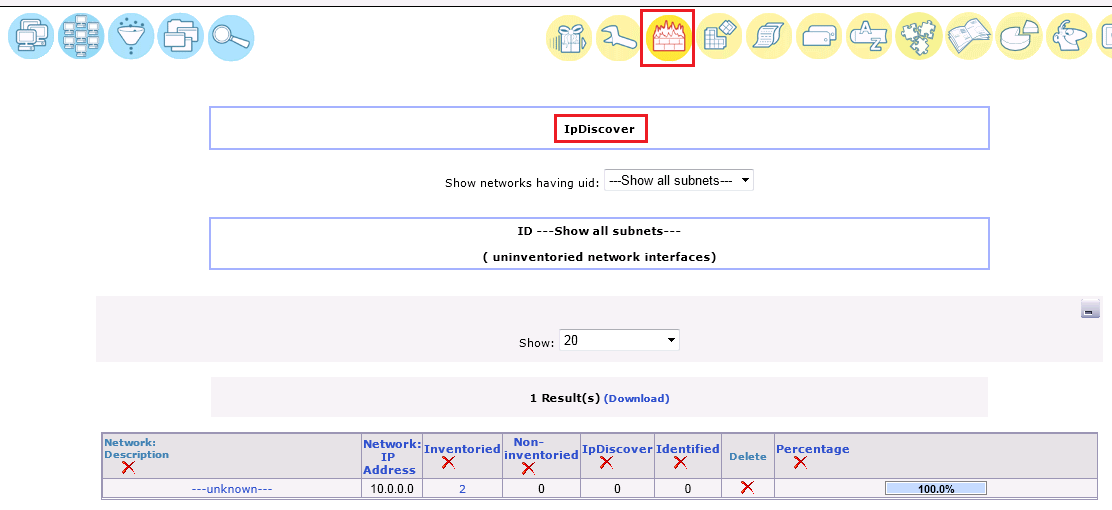
這邊一個比較奇怪的是, 安裝好之後沒有看到相關資訊
Notes:
Log 存放路徑
C:\Users\All Users\OCS Inventory NG\Agent\OCSInventory.log
之前就是修改 ocs 密碼, 但是沒有把服務重開, 所以出現相關錯誤訊息
Starting OCS Inventory NG Agent on Wednesday, February 18, 2015 13:05:34.
AGENT => Running OCS Inventory NG Agent Version 2.1.1.1
AGENT => Using OCS Inventory NG FrameWork Version 2.1.1.1
AGENT => Loading plug-in(s)
AGENT => Using network connection with Communication Server
AGENT => Using Communication Provider <OCS Inventory NG cURL Communication Provider> Version <2.1.1.1>
AGENT => Sending Prolog
ERROR *** AGENT => Failed to send Prolog <HTTP Status Code #500>
AGENT => Unloading communication provider
AGENT => Unloading plug-in(s)
AGENT => Execution duration: 00:00:00.
Linux Client
Lab: openSUSE 13.1
透過 one click install 安裝
來源選 下列版本
home:steffens:lvermg...2.1.1noarch程式碼1 Click Install
設定檔在 /etc/ocsinventory 目錄
# ls /etc/ocsinventory/
modules.conf ocsinventory-agent.cfg softwares
設定Server URL
#vi /etc/ocsinventory/ocsinventory-agent.cfg
修改設定
# server = 後面接上 OCS Inventory NG 伺服器IP
server = 10.200.1.114
# 我是有註解 local , 看文件, 如果 local 在, 就不會跑 Server 模式
#local = /var/lib/ocsinventory-agent
相關資料在 /var/lib/ocsinventory-agent 目錄下
# ls /var/lib/ocsinventory-agent/
http:__10.200.1.114_ocsinventory
透過 ocsinventory-agent 指令以及 cron.hourly 來執行更新
# ocsinventory-agent
或是
# ocsinventory-agent -s 主機IP
另外要確認 firewall 對外是否可以走 port 80 or 443 ?
定時排程
# ls /etc/cron.hourly/
ocsinventory-agent
log 存放在 /var/log/ocsinventory-agent/
# ls /var/log/ocsinventory-agent/
ocsinventory-agent.log
# crontab -l
# DO NOT EDIT THIS FILE - edit the master and reinstall.
# (/tmp/crontab.qrqSLY installed on Thu Feb 19 12:05:43 2015)
# (Cronie version 4.2)
30 11 * * * /usr/sbin/ocsinventory-agent
Todo:
- 還要研究管理
- 大量派送
-------------------------------
openSUSE 13.1 use tar.gz install
#zypper in -y perl-Crypt-SSLeay perl-Net-IP perl-LWP-Protocol-https
#wget -P /root/ https://launchpad.net/ocsinventory-unix-agent/stable-2.0/2.0.5/+download/Ocsinventory-Unix-Agent-2.0.5.tar.gz
#tar -zxvf Ocsinventory-Unix-Agent-2.0.5.tar.gz
#cd Ocsinventory-Unix-Agent-2.0.5/
#zypper install nmap
#OneClickInstallCLI http://software.opensuse.org/ymp/devel:languages:perl/openSUSE_13.1/perl-Proc-Daemon.ymp
#zypper install perl-Proc-PID-File
#PERL_AUTOINSTALL=1 perl Makefile.PL
# zypper install gcc
# zypper install make
#make
#make install
#mkdir -p /etc/ocsinventory-agent
#mkdir -p /var/lib/ocsinventory-agent
#mkdir -p /var/log/ocsinventory-agent
#mkdir -p /var/run
#/usr/bin/ocsinventory-agent -s 10.200.1.114
# crontab -l
# DO NOT EDIT THIS FILE - edit the master and reinstall.
# (/tmp/crontab.swYPsN installed on Sat Feb 21 21:56:34 2015)
# (Cronie version 4.2)
30 10 * * * /usr/bin/ocsinventory-agent -s 10.200.1.114
參考文件
Notes:
嘗試用 openSUSE 13.1 安裝 server 但是有些套件相依性要克服
有些套件安裝後可以解決相依性先記下來
- php5-devel
- php5-gd
- mysql-community-server
- make
- apache2-mod_php5
- apache2-mod_perl-devel
有些 perl 模組可以透過 cpan 來安裝
例如
cpan -i Apache2::SOAP
但是這個模組一直有問題
沒有留言:
張貼留言